
How to Upload and Enhance Real Estate Photos
Upload listing photos, choose the right AI enhancements, compare before and after, and download your finished images in PropertyPixel Studio.

Improve lighting, clear clutter, or refresh an exterior in a few steps. This guide follows the desktop Studio from your first upload to downloading finished photos. Your originals stay available; each completed enhancement creates a separate version.
1. Create a project and upload photos
From the dashboard, click New Project, or open the project for your listing. You can click the project name at the top of Studio to rename it.
In an empty project, drag photos onto Drop property photos here, or click the drop zone to browse your files. Upload up to 25 photos at once, 25 MB each. Supported formats include JPEG, PNG, WebP, and HEIC/HEIF.
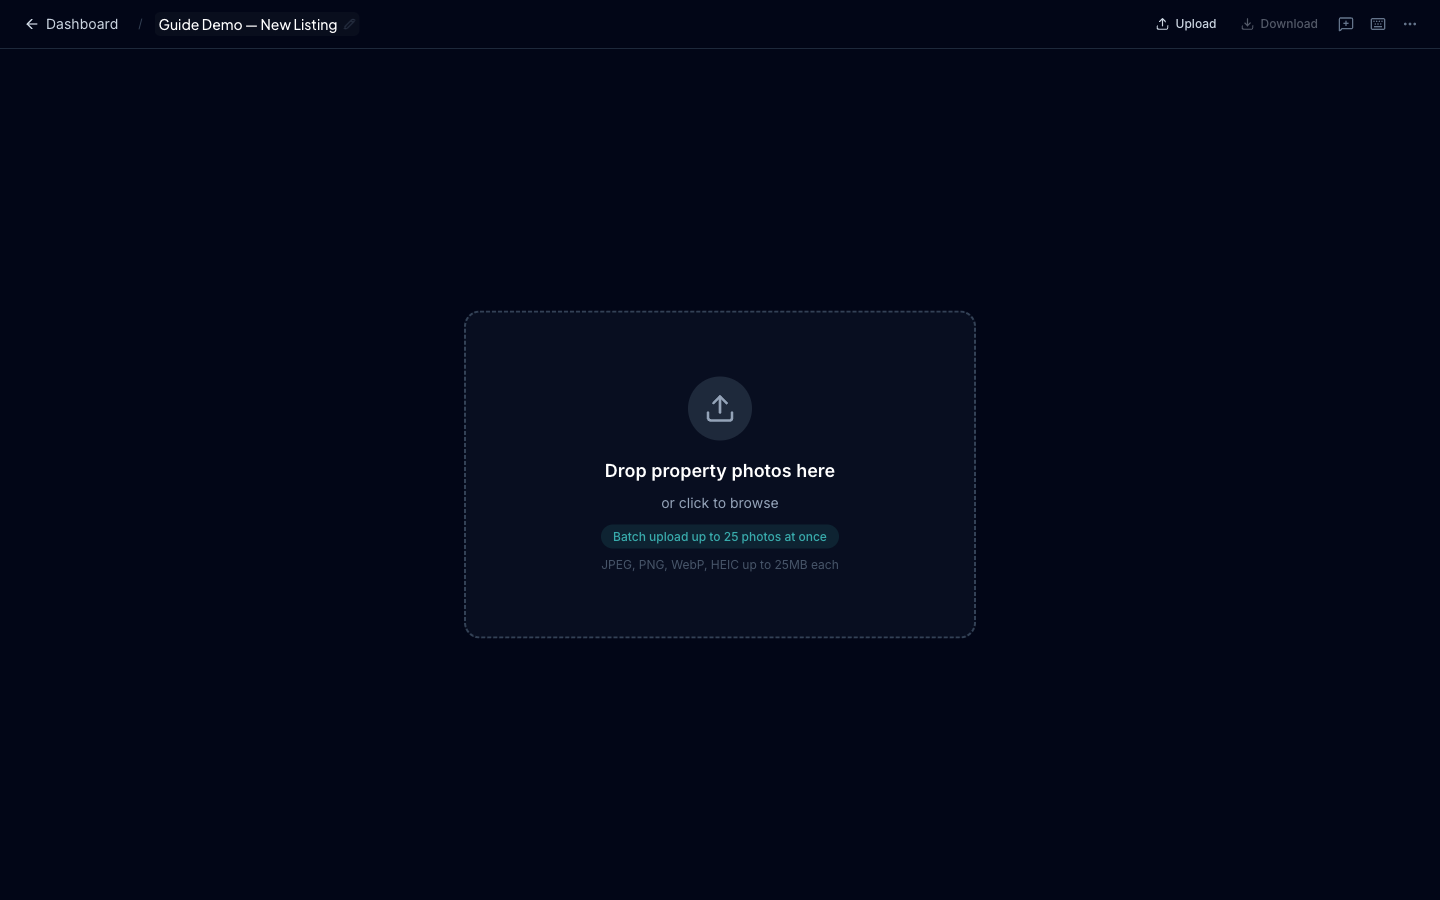
After uploading, your photos appear in the strip along the bottom. Click a thumbnail to open it. To add more photos later, use Upload in the top bar or the + tile in the photo strip.
2. Choose the enhancements you need
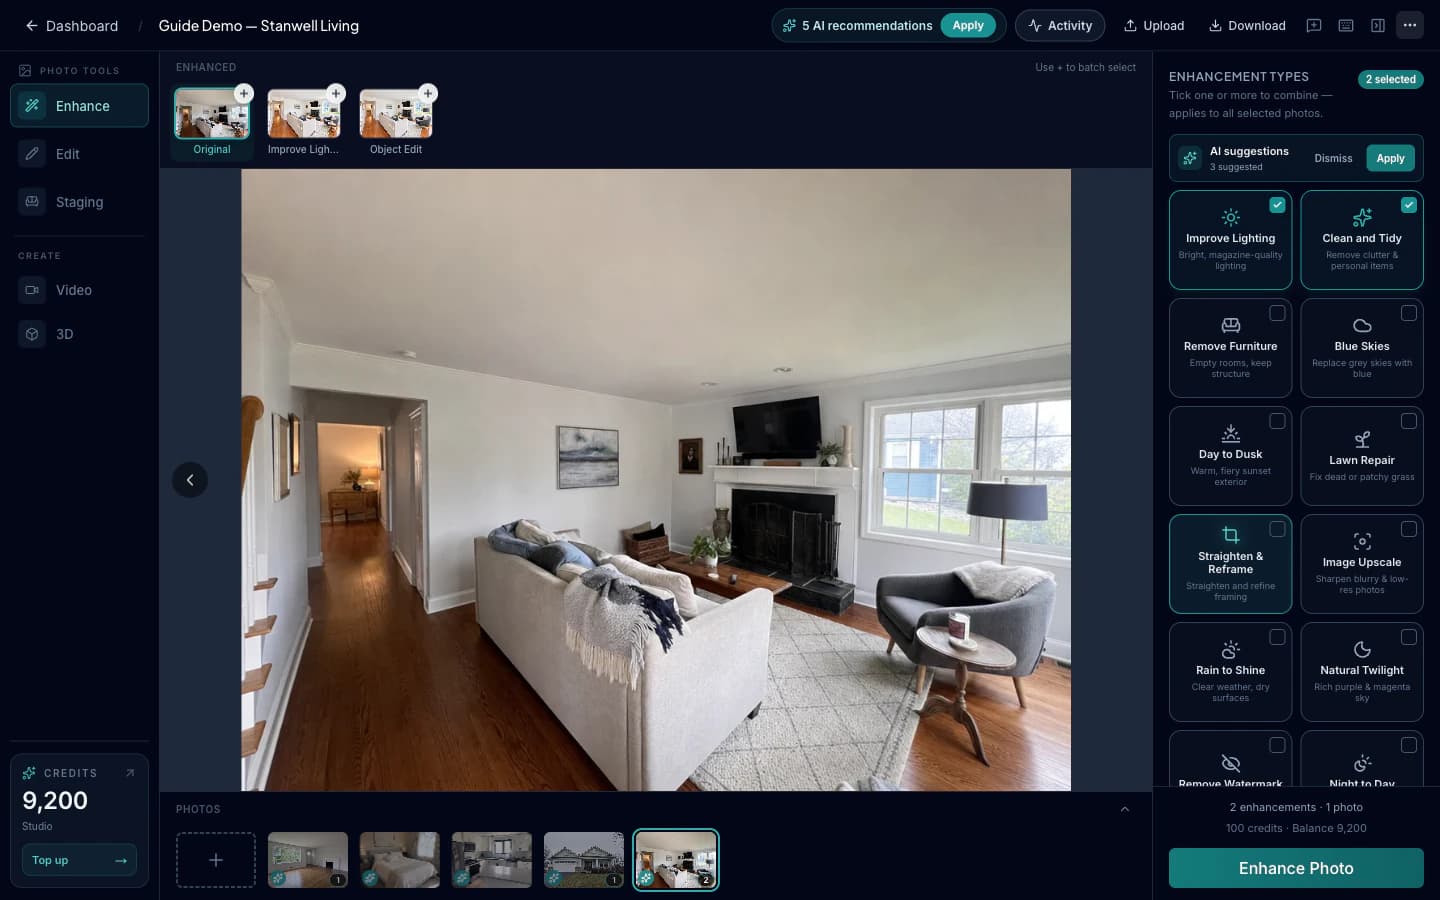
Open Enhance under Photo tools on the left. Select one or more tiles in the right panel:
| What you want to fix | Choose |
|---|---|
| A dark or flat-looking room | Improve Lighting |
| Clutter and personal items | Clean and Tidy |
| Furniture you want to clear | Remove Furniture |
| An overcast exterior sky | Blue Skies |
| A twilight-style exterior | Day to Dusk or Natural Twilight |
| Patchy grass or dull pool water | Lawn Repair or Pool Water |
| Tilted framing or low resolution | Straighten & Reframe or Image Upscale |
The panel also includes Rain to Shine, Night to Day, and Remove Watermark. Scroll to see all the options. Only remove watermarks from images you have permission to edit.
Combine tools when they serve the same goal—for example, Improve Lighting with Clean and Tidy. Choose one sky treatment rather than combining daytime and twilight effects. If AI suggestions appear, review them before clicking Apply.
3. Run the enhancement
Check the photo, selected tools, and credit total, then click Enhance Photo. Open Activity in the top bar to check progress.
For a batch, use the + on the version thumbnails above the photo to add the versions you want to process. The button changes to Enhance N Photos. The same tool selection applies to every item in the batch, so group photos with similar needs.
4. Compare the result
Select the completed version above the photo. Use Slider, Side-by-Side, or Toggle to compare it with the original; Single shows just the selected version.
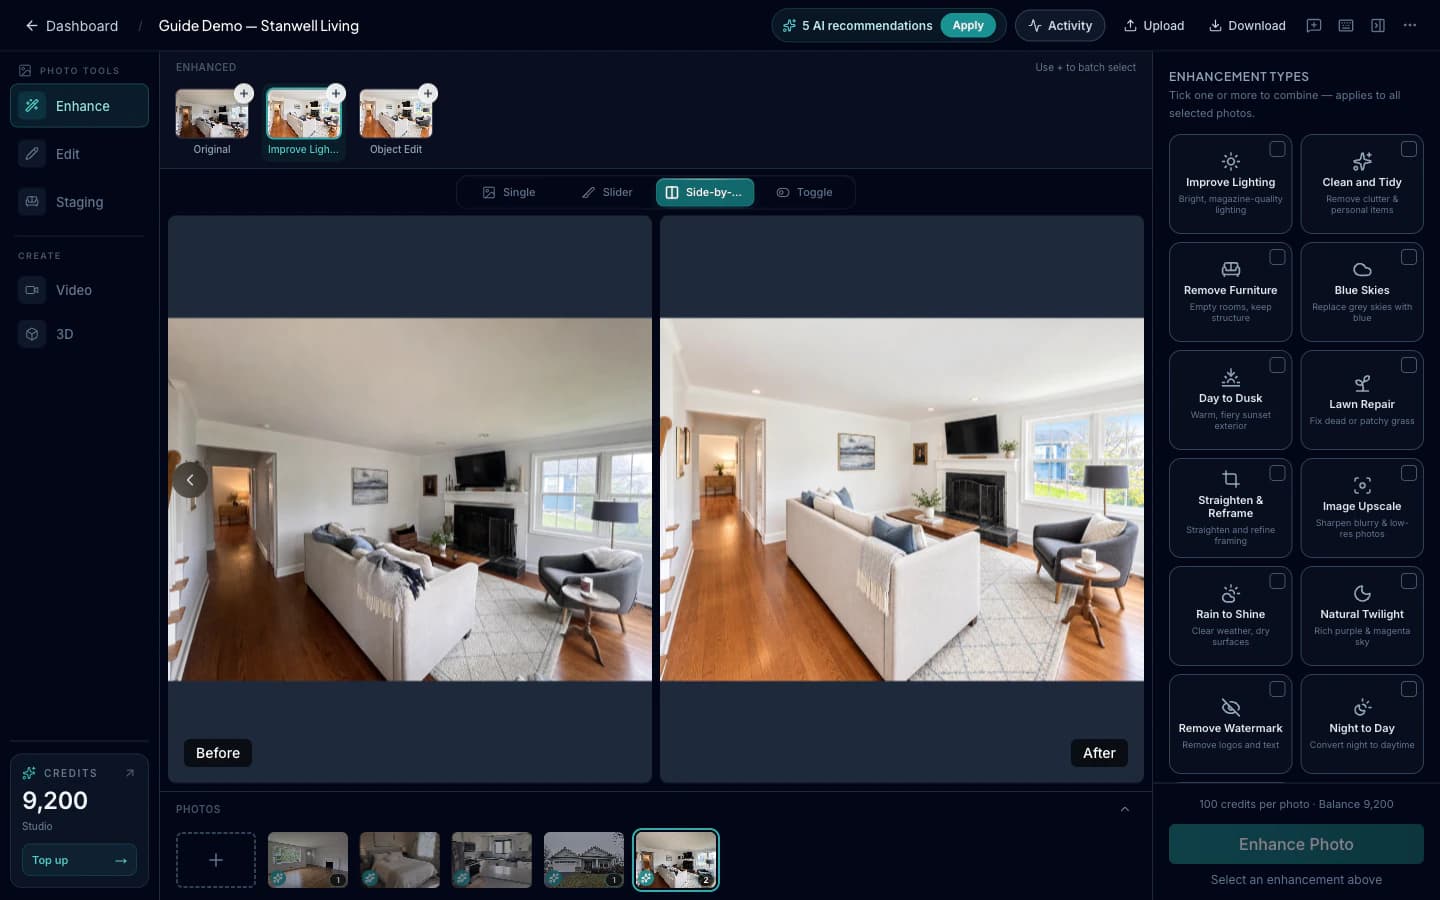
Check windows, reflections, furniture edges, and the property's fixed features. The result should solve the original problem without misrepresenting the space.
5. Download your chosen versions
Click Download in the top bar to open Download Images. Select the results you want, or use Download All to export the available results together. Use Preview to inspect an individual version before downloading it.
FAQ
Why is Enhance Photo disabled?
Select a photo and at least one enhancement tile. Choosing a different photo version can clear the enhancement selection, so check the right panel again before running it.
What if just one detail still needs fixing?
Open the best version and use Targeted AI Edits for a specific object or area. For an empty room that needs furniture, use Virtual Staging.
Related resources
Try the workflow in PropertyPixel
Create a project, upload your listing photos, and turn them into polished photos, videos, and 3D tours from one Studio.