
How to Create a Real Estate Video from Listing Photos
Create a clip from one listing photo or a tour from up to nine. Arrange your storyboard, choose a format, and download an MP4 in PropertyPixel.

Turn one photo into a short Photo to Video clip, or combine 2–9 photos into a Listing Tour. Studio chooses the mode from your photo count and joins multi-photo clips with crossfades.
1. Open Video and select your photos
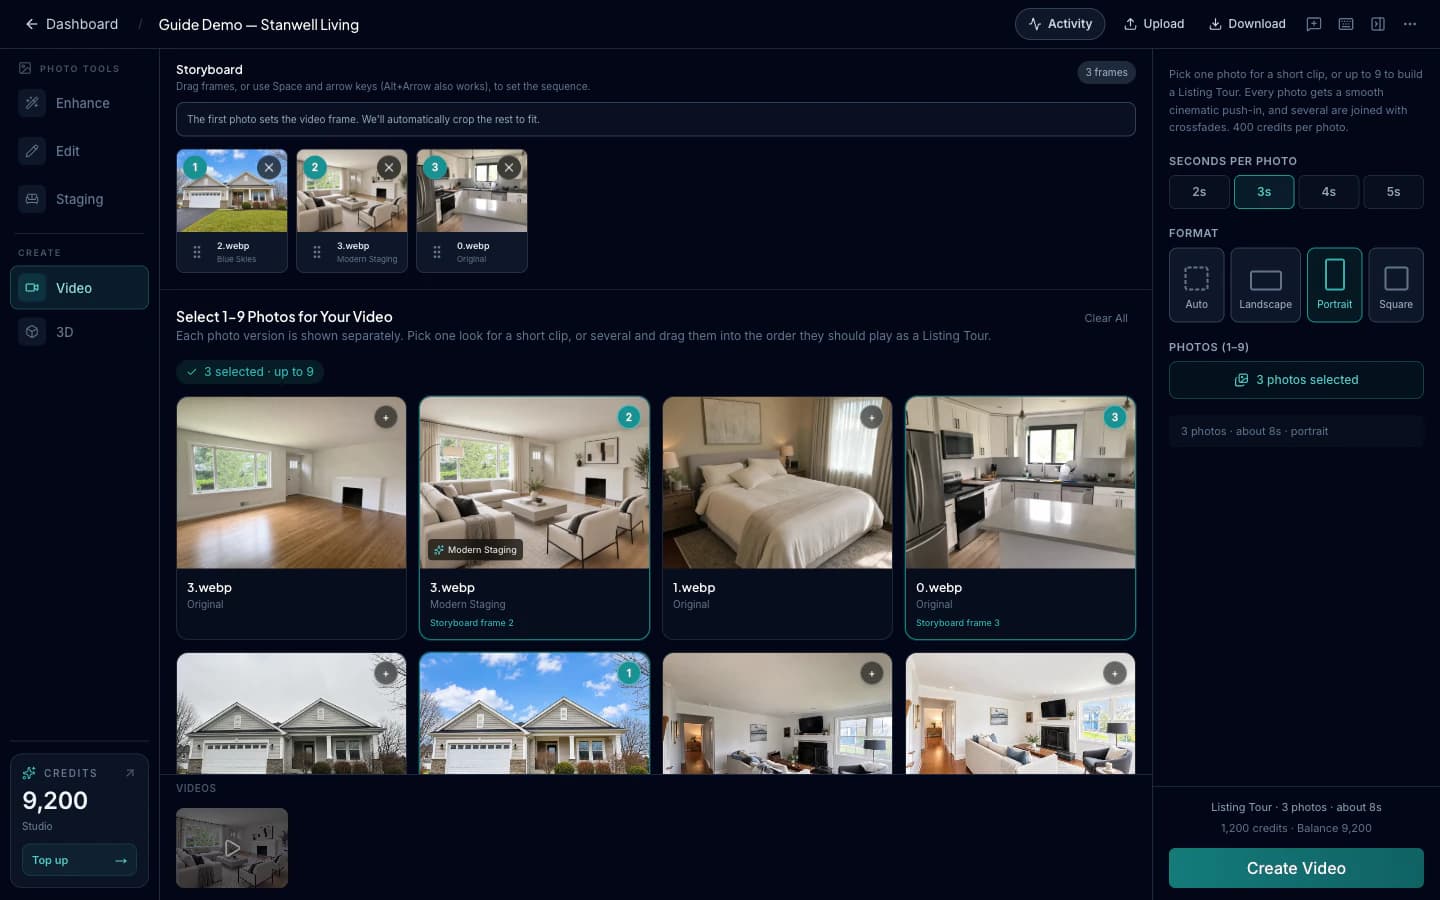
Open your project in Studio and click Video on the left. Select photos from the main grid to add them to the Storyboard at the top.
Original, enhanced, and staged versions appear as separate choices. Pick the version you want viewers to see; usually you only need one version of each photo. If a photo still needs work, enhance it first.
2. Put the storyboard in order
For a Listing Tour, drag frames by their handles into playback order. A simple sequence is exterior, living area, kitchen, then bedrooms. The numbered badges show each photo's place in the video. Use the × on a storyboard frame to remove it.
3. Choose duration and format
In the right panel, set Seconds per photo to 2, 3, 4, or 5 seconds. The default is 3 seconds. For a tour, the displayed total is approximate because clips overlap during transitions.
Choose a Format:
| Format | Best suited to |
|---|---|
| Auto | Matching the first photo's nearest supported aspect ratio |
| Landscape (16:9) | Listing pages, websites, and landscape video placements |
| Portrait (9:16) | Reels, TikTok, Shorts, and Stories |
| Square (1:1) | Square social feed posts |
Photos are cropped to fit the video frame. Choose compositions that keep important room features visible in your intended format.
4. Check the total and create the video
Video costs 400 credits per selected photo. One photo costs 400 credits; the three-photo tour shown above costs 1,200 credits. Check the mode, photo count, estimated length, and cost above Create Video, then click it to begin.
Open Activity to follow progress. Completed videos appear in the Videos strip at the bottom.
5. Play it back and download
Click a completed video to preview it. Check the room order, crop, transitions, and motion before publishing. Use Back to return to the storyboard.
Click Download in the top bar to open Download Videos, then Download beside the video you want. The file is an MP4.
FAQ
Why is Create Video disabled?
Select at least one photo from the grid. A completed video in the bottom strip is an output, not a selected source photo.
Do I need to switch between Photo to Video and Listing Tour?
No. One selected photo creates a clip; selecting a second photo changes the workflow to a Listing Tour. You can use up to nine photos.
Related resources
Try the workflow in PropertyPixel
Create a project, upload your listing photos, and turn them into polished photos, videos, and 3D tours from one Studio.