
How to Use Targeted AI Edits on Property Photos
Select an object or area, remove it, recolor it, or describe a change. Learn how to save and apply up to three targeted edits in PropertyPixel.

Use targeted edits when a photo is nearly ready but one object or area needs attention. Select the area, choose what to change, and save up to three edits to run together. The edited result is a new version; your source photo stays available.
1. Open the photo you want to edit
Open your project in Studio and choose a photo from the bottom strip. If you want to build on an enhancement, select that version above the photo first. Then open Edit under Photo tools on the left.
Need to upload photos first? Start with the upload and enhancement guide.
2. Select an object or area
Use the toolbar over the photo:
- Select: click an object to select it automatically.
- Box: drag around the object you want to select.
- Brush: paint an area manually, useful for irregular shapes or missed details.
- Erase: remove parts of the selection that extend too far.
The highlighted area is the mask—the part you are asking the AI to change. Check it before saving the edit. Use Undo to reverse the last selection change, or Clear to start the selection again.
3. Choose what to change
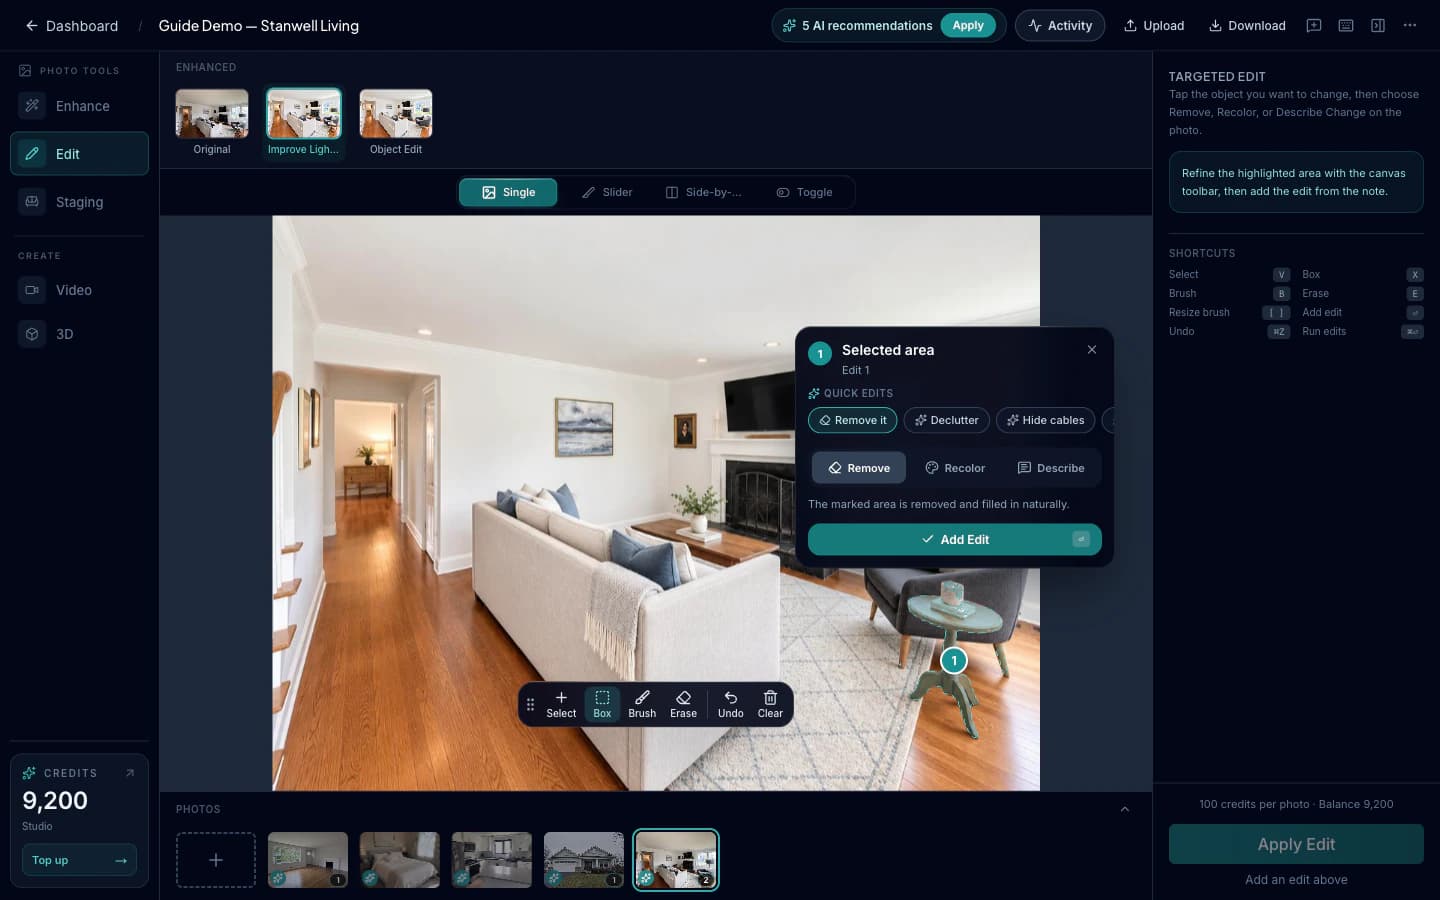
The Selected area card opens on the photo. Choose:
- Remove to remove the selected object and fill in the space.
- Recolor to change its color.
- Describe to write a specific change, such as “replace the red cushion with a beige cushion.”
Quick edits such as Remove it and Hide cables offer shortcuts. Whichever option you use, click Add Edit to save it to your plan.
4. Review the plan and apply it
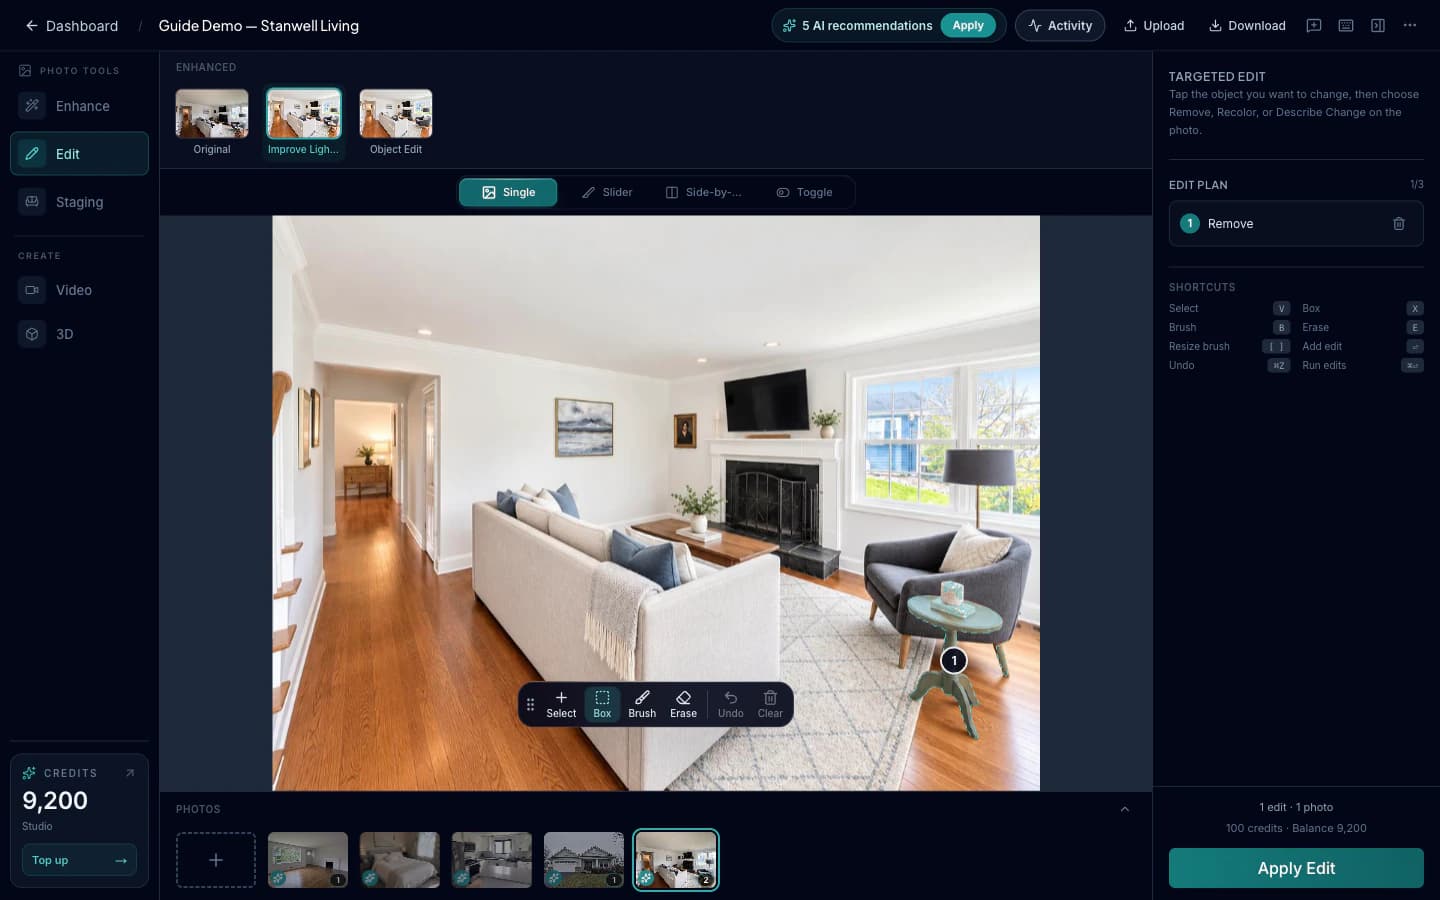
A saved edit appears as a numbered marker on the photo and an item in Edit Plan on the right. Click its marker to review or change it; use the trash icon beside the plan item to remove it.
You can select another area and add another edit, up to three in one run. When the plan is ready, check the credit total and click Apply Edit or Apply N Edits.
5. Review and download
Check progress in Activity. When the edited version appears above the photo, select it and compare it with the source. Look closely at the edited area and its surroundings: floor patterns, shadows, and nearby furniture should still make sense.
Click Download in the top bar and choose the result you want to export. If an area needs another pass, select the version you want to work from and make a more precise selection or instruction.
FAQ
Why is Apply Edit still disabled after I select an area?
A selection alone is not a saved edit. Choose an operation in the Selected area card and click Add Edit first.
When should I use another tool?
Use Enhance for whole-photo lighting or clutter fixes and Staging to furnish a room. Keep targeted edits focused on small changes, and avoid changes that misrepresent permanent features or hide defects.
Related resources
Try the workflow in PropertyPixel
Create a project, upload your listing photos, and turn them into polished photos, videos, and 3D tours from one Studio.