Real Estate Reels: Turn Listing Photos into Vertical Video
The single highest-engagement content a real estate agent posts on Instagram or TikTok is usually a 15-second vertical video of a listing. Not a carousel. Not a static photo. A short, vertical clip that fills the screen. This guide covers how to turn your existing listing photos into real estate reels that people actually watch — and what AI image-to-video can and can't do.
The format shift from horizontal to vertical and from static to moving isn't new, but the tooling is. Five years ago, making a vertical video from your listing photos meant an hour in Premiere Pro per clip. Today, an AI image-to-video model can generate a smooth camera push from a single still in a few minutes. For agents sitting on a library of good horizontal listing photos, that's a lot of unused inventory suddenly usable on TikTok, Reels, YouTube Shorts, and the vertical video feeds that listing apps like Zillow and Realtor.com have rolled out.
The catch, as with any AI tool: the output is only as good as the input. A blurry photo makes a blurry video. A photo with blown windows makes a video with blown windows. Prep the source, pick the right shots, and the rest gets easy.
Why Vertical Video Beats Static Photos on Social
Three things are going on, in order of importance:
- Full-screen format. A vertical video fills the phone. A horizontal video letterboxes to a third of the screen. Everything else being equal, the vertical version keeps viewers watching longer.
- Algorithm bias toward video. Instagram, TikTok, and YouTube all prioritize video in feed and search because video keeps users on the platform longer. Posting video gets you reach that posting photos doesn't.
- Motion holds attention. A static listing photo competes with every other static photo in the feed. A 1-second camera pan across a kitchen — even a small one — reliably outperforms the same kitchen as a still.
None of this is magic. It's just what the platforms are rewarding right now. That can change. For the next couple of years, at least, vertical video is where the organic reach is.
What AI Image-to-Video Actually Does
Because this is where most of the marketing hype lives, here's the honest version of what these tools produce.
An AI image-to-video model takes a single still image and generates a 2-6 second clip by inferring what a slow camera movement through that scene would look like. PropertyPixel's image-to-video feature does a smooth push, pull, or pan based on the photo's composition. Other tools offer similar movements.
What it does well:
- Subtle dolly-ins on well-composed rooms with clear depth (living rooms with a focal point like a fireplace or a window, kitchens with an island)
- Slow pan-outs on exterior shots where the camera reveals the property context
- Short, looping clips that work as social teasers
What it doesn't do:
- Generate a full walkthrough of a home from one photo. It can't invent rooms you didn't capture.
- Produce long clips (the current practical limit is around 6 seconds before artifacts become obvious)
- Convincingly animate anything outside the frame — it doesn't know what's beyond the walls it sees
- Handle photos with moving elements well (a ceiling fan, a flag, water) — you'll see subtle motion artifacts
- Replace actual video shot on the property for high-end listings
If you need a true walkthrough, you want either a real video tour, a 3D virtual tour, or a stitched series of short AI-generated clips. For a direct comparison between 3D tours and video walkthroughs, see our post on 3D tours vs. video walkthroughs.
Picking the Right Photos to Turn Into Reels
Not every photo makes a good video. Pick images that already have the ingredients motion needs.
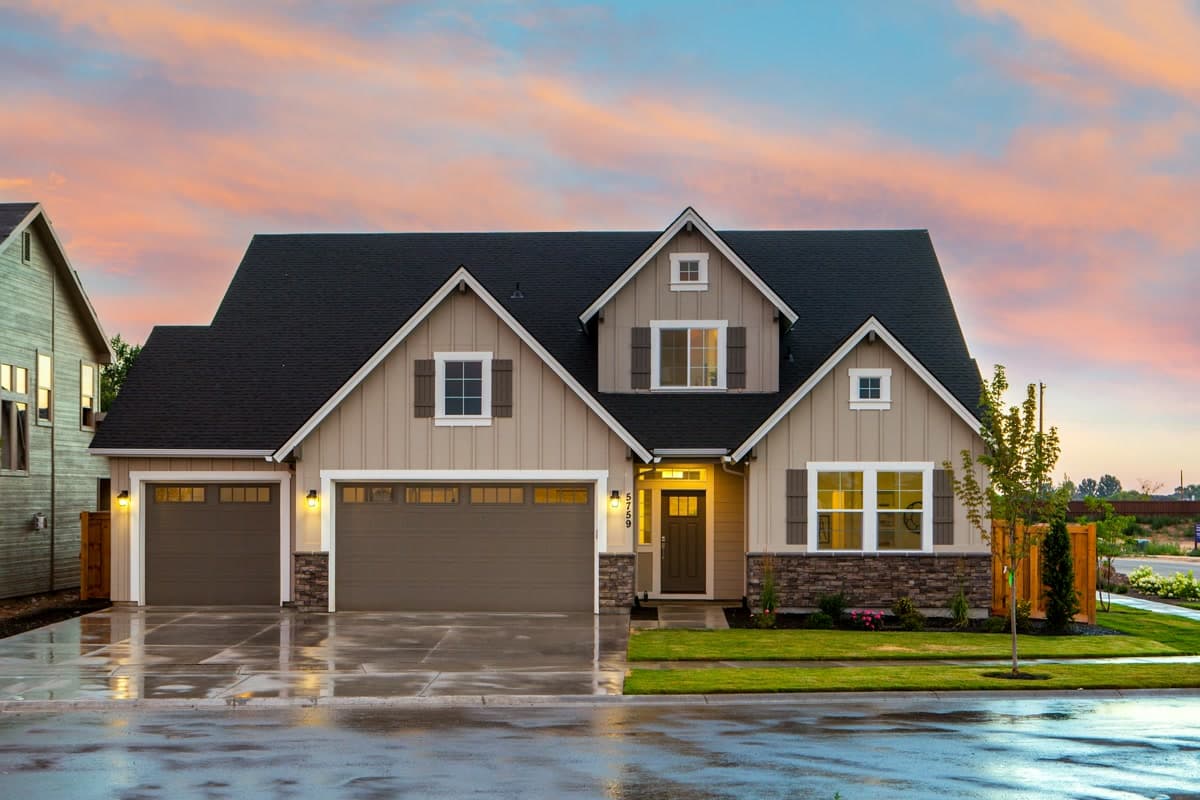
Photos that work well:
- Living rooms shot from a corner with visible depth (couch in foreground, window in background)
- Kitchens with a clear leading line (an island, a long counter, a window wall)
- Exteriors with space around the house (driveway, lawn, neighborhood context)
- Primary bedrooms with a window view or a clear focal point
- Twilight exteriors (these look cinematic as short clips almost by default)
Photos that don't:
- Tight detail shots with no negative space (a close-up of a countertop, a bathroom fixture)
- Crowded or cluttered rooms (motion amplifies visual chaos)
- Photos with sharp perspective distortion from ultra-wide phone lenses
- Anything blurry or underexposed in the source
Before running photos through image-to-video, clean them up. Remove clutter using automated decluttering. Fix lighting. Straighten verticals. Prep as you would for any enhancement — see our full pre-processing checklist at how to prepare property photos for AI enhancement.
Aspect Ratios and Length by Platform
Getting the format right is boring but load-bearing. The wrong ratio means black bars, cropped captions, or rejected uploads.
| Platform | Aspect ratio | Length sweet spot | Max length |
|---|---|---|---|
| Instagram Reels | 9:16 | 15-30 seconds | 90 seconds |
| TikTok | 9:16 | 15-45 seconds | 10 minutes (but nobody watches) |
| YouTube Shorts | 9:16 | 30-60 seconds | 3 minutes |
| Facebook Reels | 9:16 | 15-45 seconds | 90 seconds |
| Instagram Stories | 9:16 | 15 seconds per slide | 60 seconds total |
| Zillow/Realtor.com video | 16:9 or 9:16 depending | 30-60 seconds | Varies |
The pattern: 9:16 (vertical, 1080 x 1920 pixels) is the universal default. Shoot, export, and post in that ratio unless a specific platform demands otherwise.
For length, shorter wins on discovery platforms (TikTok, Reels) and slightly longer wins on YouTube Shorts. If you're going to pick one length to produce, 20 seconds is the median-best number across platforms.
Building a Reel From Listing Photos
A practical workflow that produces watchable content in under 15 minutes per listing.
Step 1: Pick 4-6 Hero Shots
For a 20-second reel, four to six photos is right. Fewer and the pacing drags; more and no shot lands. Choose your strongest exterior, two or three interior highlights (living, kitchen, primary bedroom), and one detail shot.
Step 2: Generate Image-to-Video Clips
Run each photo through an image-to-video tool. PropertyPixel's image-to-video produces 3-5 second clips per image; batch the whole set and grab the outputs. If you want a specific movement on a specific shot (push instead of pan, for example), most tools let you pick.
Step 3: Stitch in a Mobile Editor
CapCut and Instagram's native editor both handle this cleanly. Drop the clips in order, trim to 2-4 seconds each, and add hard cuts or fades between them. Avoid fancy transitions — they age badly and look amateur.
Step 4: Add Music
This is where most agents get in trouble, so read the music rights section below before you pick a track.
Step 5: Caption and Export
Add a short on-screen title (listing address, price, or a one-line hook). Export at 1080 x 1920, 30 fps, H.264. Upload directly to each platform rather than cross-posting — the algorithms penalize watermarked reposts.
Pro Tip
Save your source photos, your generated clips, and your final export in separate folders per listing. You'll want to repurpose the clips into longer compilations, agent-intro reels, and "sold" announcement posts later. Keeping the raw generated clips accessible saves you from regenerating from scratch.
Music Rights: The Thing Nobody Talks About
Using the wrong song on a listing reel can get your content muted, your post taken down, or (in rare cases) your account flagged. It's also the single most common mistake agents make.
On Instagram and Facebook Reels: You can use tracks from the platform's in-app music library freely for organic posts. You cannot use them for ads or any post boosted with paid spend. If you boost a reel with licensed music, Meta will strip the audio.
On TikTok: Same rule for personal accounts. Business accounts have a more limited "commercial music library" — if you've switched to a Business or Creator account for analytics, some of the viral tracks become unavailable. You can't license around this.
On YouTube Shorts: More restrictive. You can only use tracks from YouTube's Creator Music library or the Audio Library. Popular tracks often aren't available, and some are only available with revenue-sharing (you give up monetization on that video).
On Zillow, Realtor.com, and MLS video uploads: None of the in-app social music libraries apply. You need royalty-free music licensed for commercial use. Services like Epidemic Sound, Artlist, and Musicbed start at $10-20/month and cover this cleanly.
The safe default: use platform-native music on platform-native posts, and royalty-free licensed tracks on anything that touches MLS or property-search platforms.
What Gets Engagement (And What Doesn't)
After a lot of testing by agents sharing data openly, the pattern is consistent.
Formats that work:
- Hook in the first second. Open with the single best shot of the property, not a branded title card. Title cards get scrolled past.
- One-line on-screen captions. "$1.2M in Scottsdale," "3 bed, backs to greenbelt," "Coming Friday." Short. Readable without sound.
- Price on-screen. Reels without price lose to reels with price on engagement. Buyers self-select.
- Trending sounds (where licensing allows). On Reels and TikTok, using a sound that's on the trending list gives you a detectable boost. The effect is modest but real.
- A clear CTA on the last frame. "DM for address," "Link in bio," "Open house Saturday 1-3."
Formats that don't:
- Long agent-intro title cards at the open
- Loud music over room-tone narration (sound design gets chaotic fast)
- Overly stylized transitions (glitches, zoom flashes) — dated fast
- Generic "tour this home!" captions without specifics
- Boosted posts with licensed audio that gets muted after the boost
Pro Tip
Post the same reel at different times of day across a week and track the one that performs best. Your audience's engagement window is mostly consistent, and finding it doubles your reach on everything you post afterward. For most agents that window is 7-9am and 7-9pm local time.
Cross-Posting Without Losing Reach
Posting the same vertical video to multiple platforms is the whole point — make once, distribute everywhere. A few rules to not torpedo the reach:
- Export clean, no watermark. TikTok and Instagram both shadow-throttle content that shows the other platform's watermark. Save your export, upload natively to each, don't "share to" between apps.
- Vary the caption and hashtags. Same video, slightly different copy per platform. Instagram leans toward fewer hashtags and a story caption. TikTok leans toward a hook line and 3-5 hashtags.
- Leave a few days between posts. Drop on Instagram Monday, TikTok Wednesday, YouTube Shorts Friday. Simultaneous posts tend to cannibalize their own engagement.
- Don't post the exact same reel on every listing. If your template becomes recognizable, engagement drops. Vary the movement, the pacing, the music.
A 15-Minute-Per-Listing Workflow That Actually Works
Most agents who fail at vertical video fail because the production takes too long per listing. Here's a workflow that caps out at roughly 15 minutes of active time per reel, once you've done it a few times.
- Minute 1-2: Pick your 4-6 photos from the listing set. Favor wide shots over detail shots. Favor shots with visible depth.
- Minute 3-5: Run the selected photos through image-to-video. While the clips generate, pull up your mobile editor.
- Minute 6-10: Drop the clips into the editor, trim each to 2-4 seconds, add the listing price and address as a one-line caption. Pick a music track from the platform's library.
- Minute 11-13: Export at 1080 x 1920, 30fps. Review once on the phone.
- Minute 14-15: Upload natively to Instagram Reels. Save the file for later upload to TikTok, Shorts, and Facebook Reels on a staggered schedule.
The first reel you make will take closer to 45 minutes. The fifth will take 15. By the tenth, you'll have a template you can run on autopilot for every new listing you take.
The economics work out favorably. A credit-based AI enhancement subscription for 20-30 listings a month runs meaningfully less than what most agents already spend on MLS premium features or a single boosted Facebook ad. The reach per listing from consistent vertical video usually exceeds both.
Reels vs. 3D Tours vs. Full Video Walkthroughs
A reel is not a tour. Pretending it is hurts the listing.
- Reels are top-of-funnel. They exist to get the listing in front of strangers on social feeds. They don't need to show the whole house. They need to make one good impression.
- 3D virtual tours are mid-funnel. A buyer clicked through, wants to see the space, and is willing to spend 3-5 minutes exploring.
- Full video walkthroughs are mid-to-bottom-funnel. Serious buyers who want a guided sense of the property before they request a showing.
For most listings in 2026, the right stack is: 3-5 vertical reels for social, one 3D tour embedded on the listing, and an optional short video walkthrough on YouTube for SEO. Image-to-video AI is genuinely useful for the first of those three, marginally useful for the third, and not useful for the second.
The Honest Limits
AI image-to-video is a legitimate tool, not a magic one. The things it doesn't replace:
- A licensed videographer on a $10M luxury listing. The output is good. It's not $10M-listing good.
- An actual drone pass for acreage. A zoomed-in pan on a drone still is not the same as a real aerial sweep.
- A gimbal walkthrough. If a buyer wants to see how the rooms flow, you need continuous camera movement through space, not stitched clips of individual rooms.
For everything below the luxury-exterior tier, though — normal listings, normal agents, normal social-feed content — turning photos into reels via AI image-to-video is the fastest path to consistent vertical video output. Spend the 10 minutes per listing, post regularly, and the compounding reach adds up.
Turn Your Listing Photos Into Scroll-Stopping Reels
Upload a photo, pick image-to-video, and get a smooth camera push in about 3–5 minutes. Free trial credits, no card required.
Continue Reading
3D Virtual Tours vs Video Walkthroughs: Which Drives More Sales?
Data-driven comparison of immersive viewing technologies for real estate marketing
Read articleHow to Prepare Property Photos for AI Enhancement
Capture, settings, and prep that get you listing-ready output — the foundation for every video pipeline
Read article15 Real Estate Photography Tips That Lead to Faster Sales
Proven techniques for shooting listing photos that attract buyers
Read articleEnhance Your Listing Photos Today
Transform your property photos with AI-powered enhancement — try PropertyPixel free with your first 3 images